

Ninth Edition: Trichromatic Photography
Making Color out of Black and White

*Before Reading this week’s edition, be sure to read up on infrared photography from the last edition of The Twin Lens Gazette.
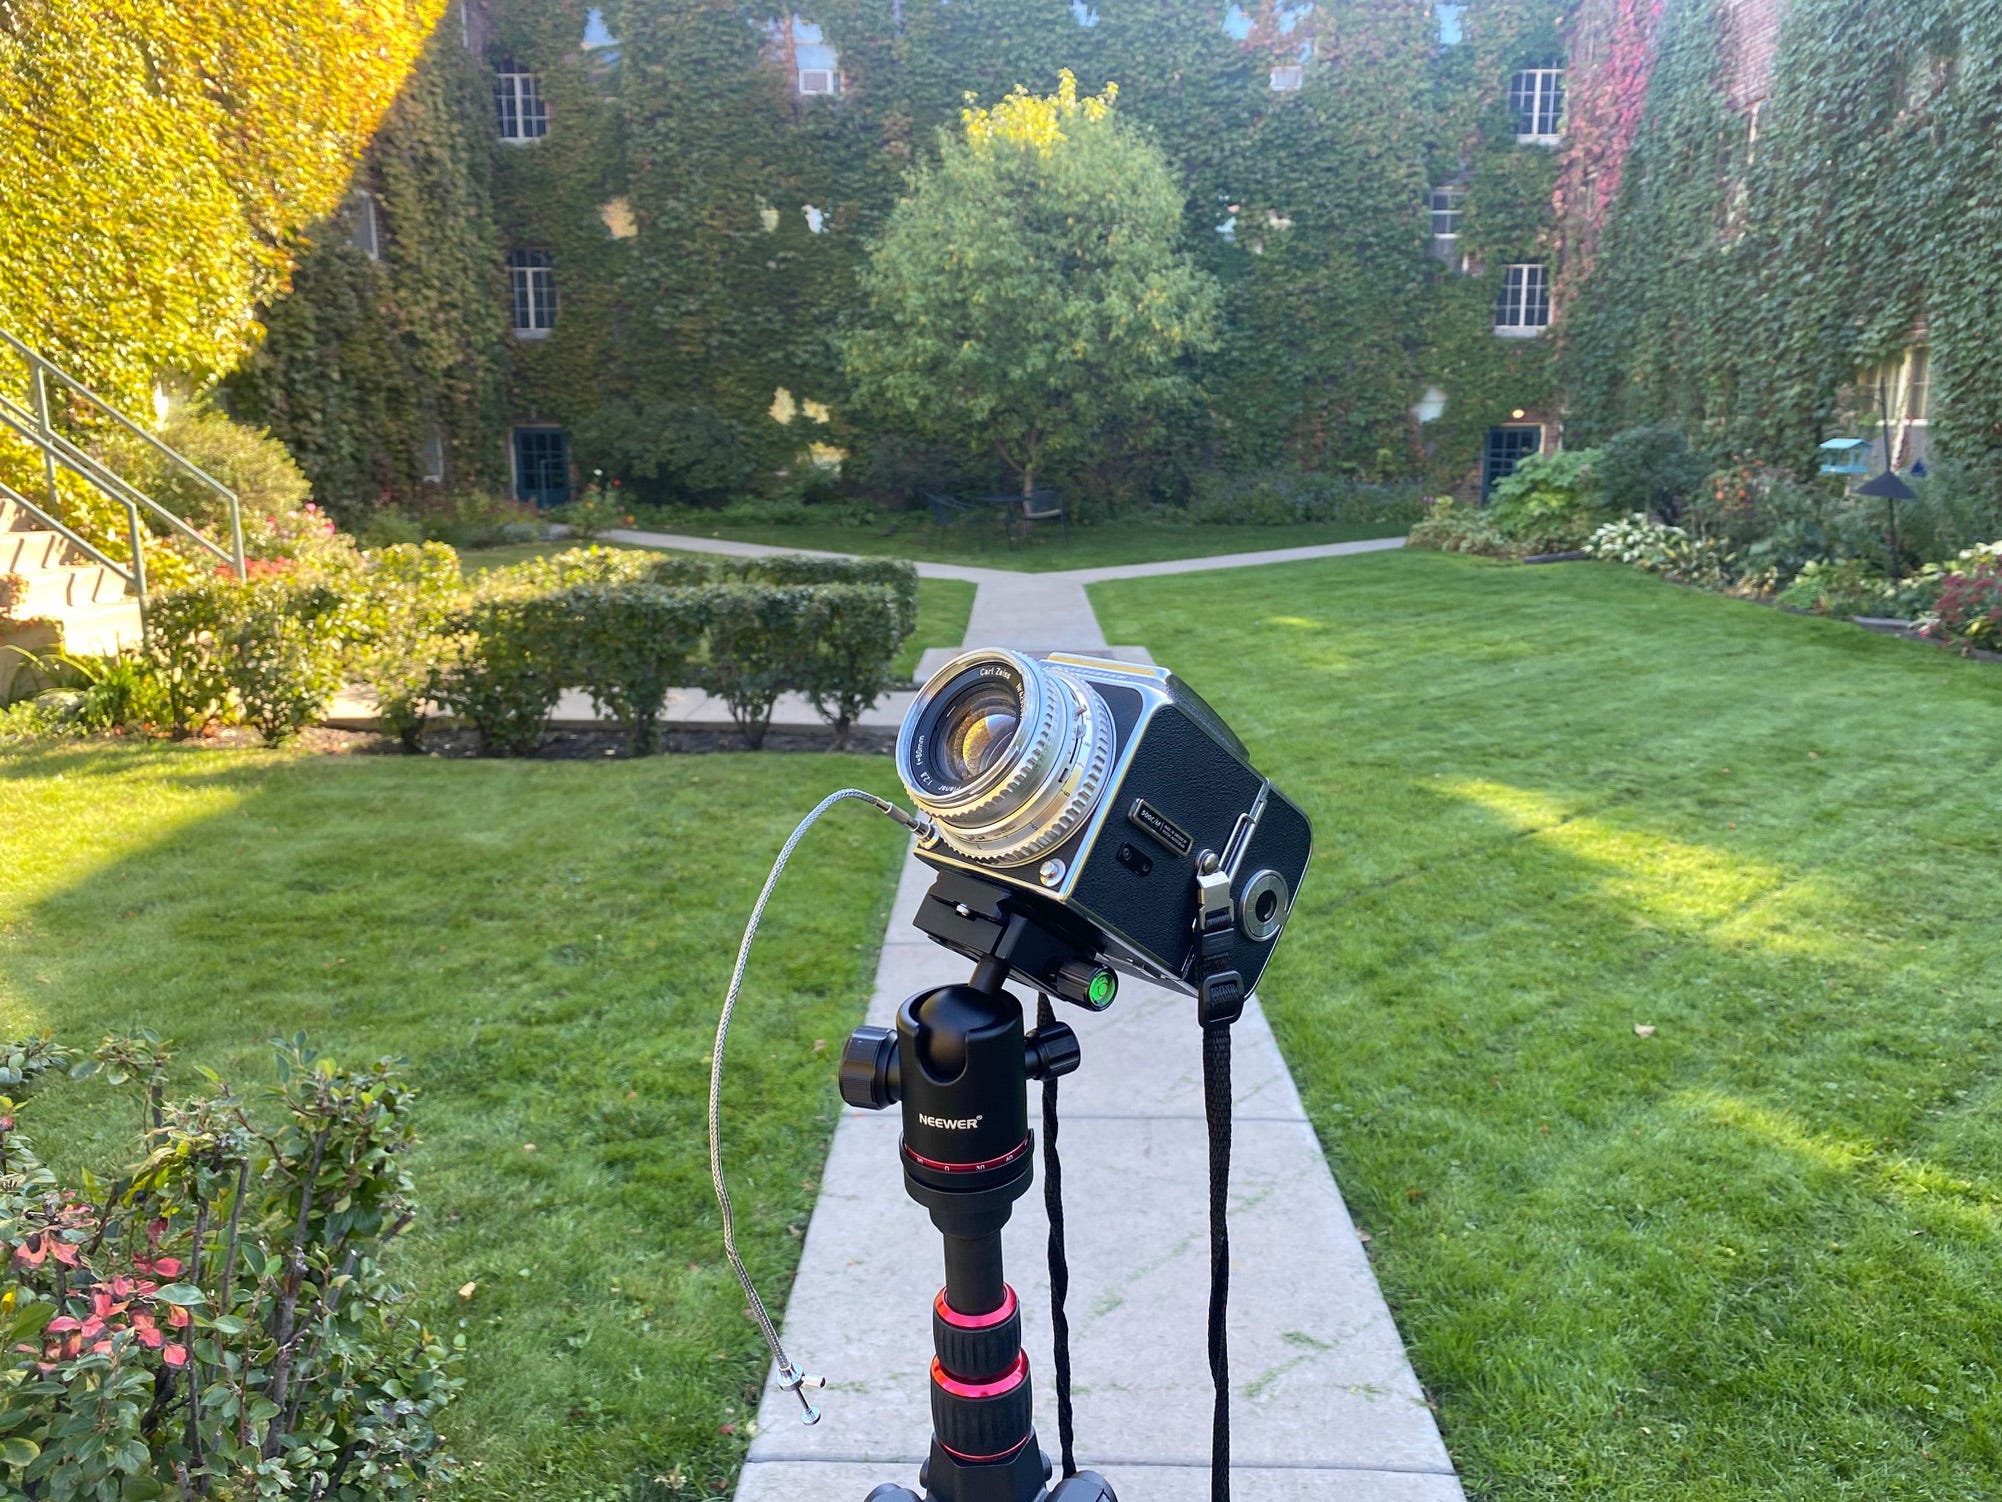
The Camera:
For this project I used two cameras: my Hasselblad 500 C/M with a Zeiss C Planar 80mm f/2.8 lens and my Mamiya C330 with a 55mm f/4.5 lens. For more information on the Mamiya, check out this previous edition of the Twin Lens Gazette and for more information on the Hasselblad, please click here.
The Film:
I used Rollei Infrared 400 film, a black and white near-infrared film that I also discussed at length in my last post.
Making the Pictures:
The goal of this project is to re-create color infrared film, which is now extinct, with only black and white infrared film. In order to accomplish this, I used a special technique called “tri-chroming”. Essentially, for every one color photo I want to create, I need to make three black and white exposures of the exact same scene. To accomplish this, I used a sturdy tripod and a shutter release cable to ensure the camera never moved out of place. The key to this technique is that each of the three photos is taken with a different filter on the lens: a red, a yellow and a blue. This filters light into the three primary colors. Since I was using an infrared film, instead of a red filter, I used a Hoya r72 infrared filter to block all light in the visible spectrum. I then made two more photos, one with the yellow and one with the blue filter, without moving the camera in any way.


The Process:
I use Kodak HC-110 black and white developer at Dilution B, which is 484mL of water with 16mL of developer concentrate (this gets the most use out of one bottle of concentrate).
Load the film into a Paterson reel and tank in total darkness.
Wash the film in water that is roughly 68°F to cool it down to temperature and prepare it to evenly receive the developer.
Mix the developer concentrate into water that is cooled to 68°F.
Pour the developer in and agitate (invert or rotate the tank) for 30 seconds, then agitate for 5 seconds, every 30 seconds for 7.5 minutes.
Wash for one minute under running water.
Fixer (I use Sprint) with the same agitation pattern for 4 minutes.
Wash for 5 minutes in running water and you’re done!
If you’re curious how I determine how long to develop different films: I use this amazing crowdsourced chart online called Massive Dev Chart.
Post-Processing:
This is where the magic happens. To create the color images, I use Photoshop to essentially combine the three pictures. First, I align and stack the images so they all become one picture with three layers. Then, I open a new blank canvas and copy each layer, one at a time, into the corresponding color channel. The new canvas has a red, green and blue channel to create a color image. By pasting the layer that I took with the corresponding colored filter, it creates a “false color” image.


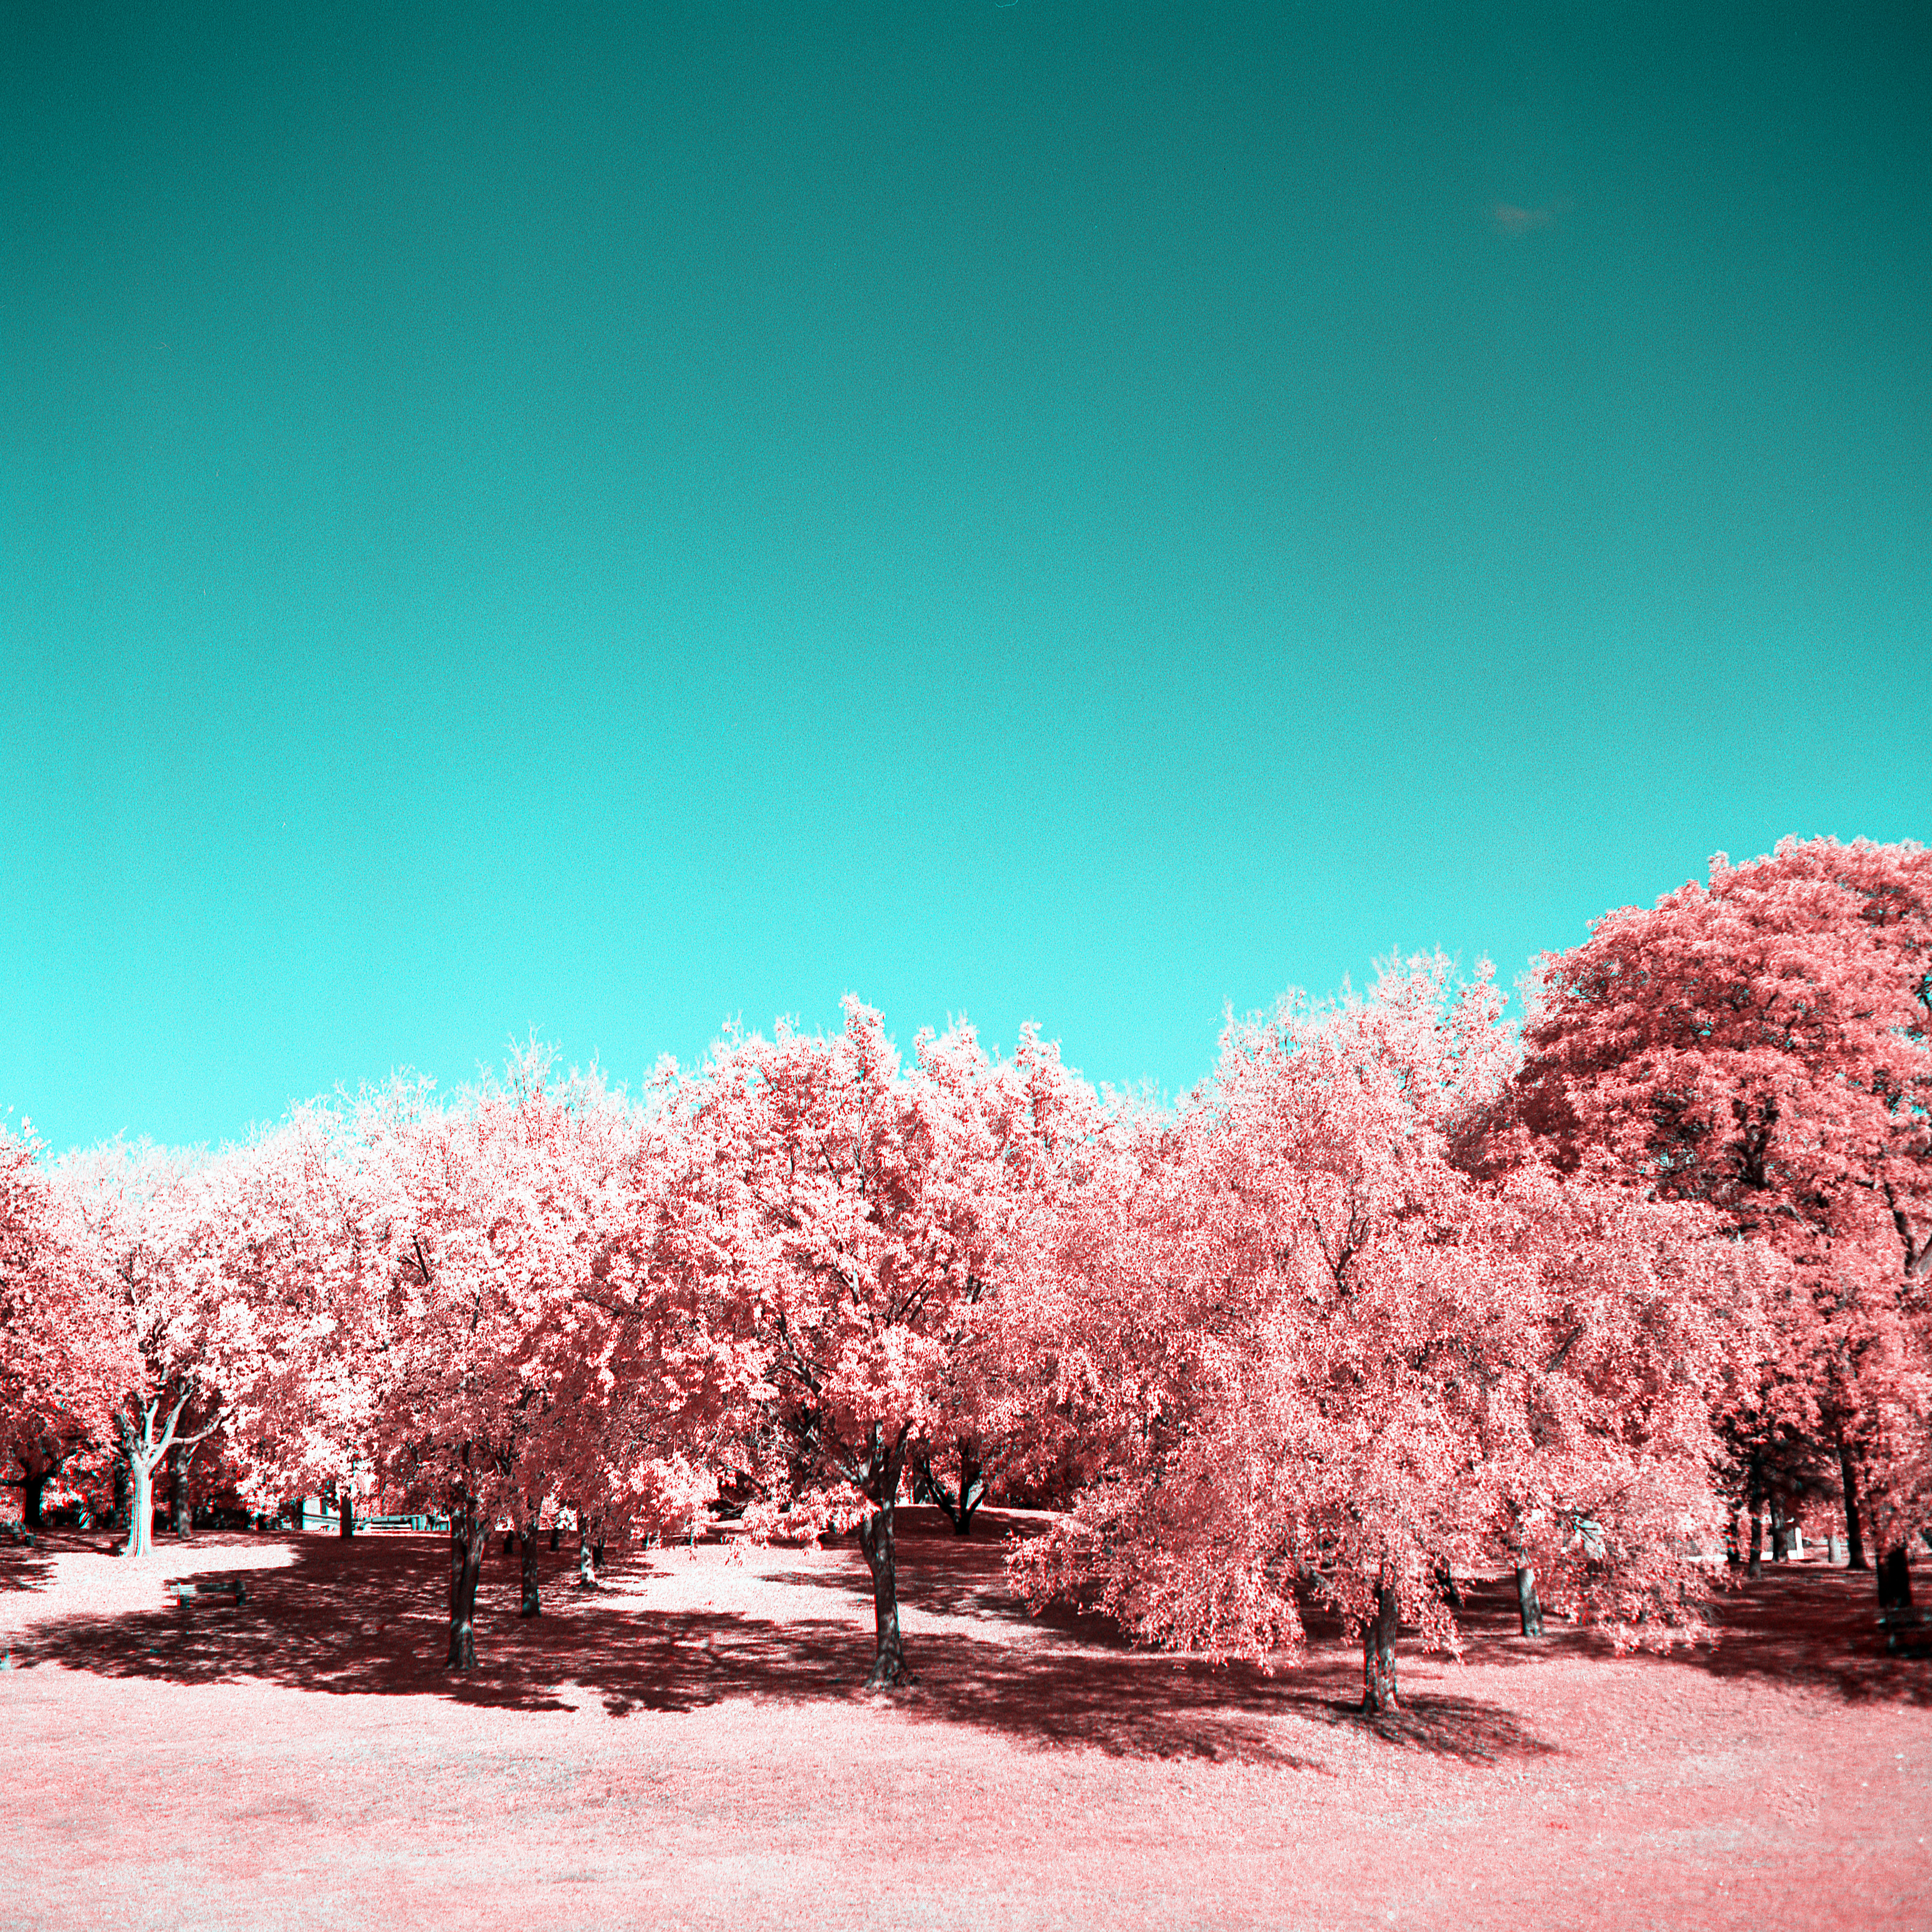
The Results:
The final images harken back to the red and pink hues that color infrared film produced. Some images were more successful than others, depending how well the three images lined up and the light conditions/exposure times I used for each set of images.


Fun Fact:
In the early days of photography, when only black and white film existed, this was the first way color images were produced. Back then, the photographer would also take three black and white photos through each colored filter and then would project the images through a corresponding filter so they stacked and created the color image.

